These stuffed bell peppers take me back to Sunday dinners at my childhood home, where the smell of peppers baking in the oven meant family was gathering around the table. After years of tweaking my mom's recipe, I've found the right balance of tender peppers, savory filling, and melted cheese on top. What started as a way to use up leftover rice has become one of our most requested comfort food dinners, especially when the weather starts getting cooler.

Why You'll Love These Stuffed Bell Peppers
These stuffed bell peppers solve the problem of what to make when you want something hearty but don't want to spend hours in the kitchen. The filling comes together quickly with ingredients you probably already have, and once they're in the oven, you can walk away for 45 minutes while they bake to perfection. The peppers steam themselves tender while the filling stays moist and flavorful.
What makes this recipe work is how the flavors develop during baking. The peppers add sweetness that balances the savory meat and rice, while the cheese on top creates that golden, bubbly finish that makes everyone excited for dinner. Plus, they look impressive enough for company but are simple enough for a regular Tuesday night when you need something satisfying and filling.
Jump to:
- Why You'll Love These Stuffed Bell Peppers
- Ingredients for Stuffed Bell Peppers
- How To Make Stuffed Bell Peppers Step By Step
- Smart Swaps for Your Stuffed Bell Peppers
- Delicious Twists on Stuffed Bell Peppers
- Equipment For Stuffed Bell Peppers
- Storing Your Stuffed Bell Peppers
- Why This Stuffed Bell Peppers Recipe Works
- Top Tip
- The Stuffed Bell Peppers Recipe My Grandma Wouldn't Let Me Forget
- FAQ
- Comfort Food Made Simple!
- Related
- Pairing
- stuffed bell peppers
- To do:
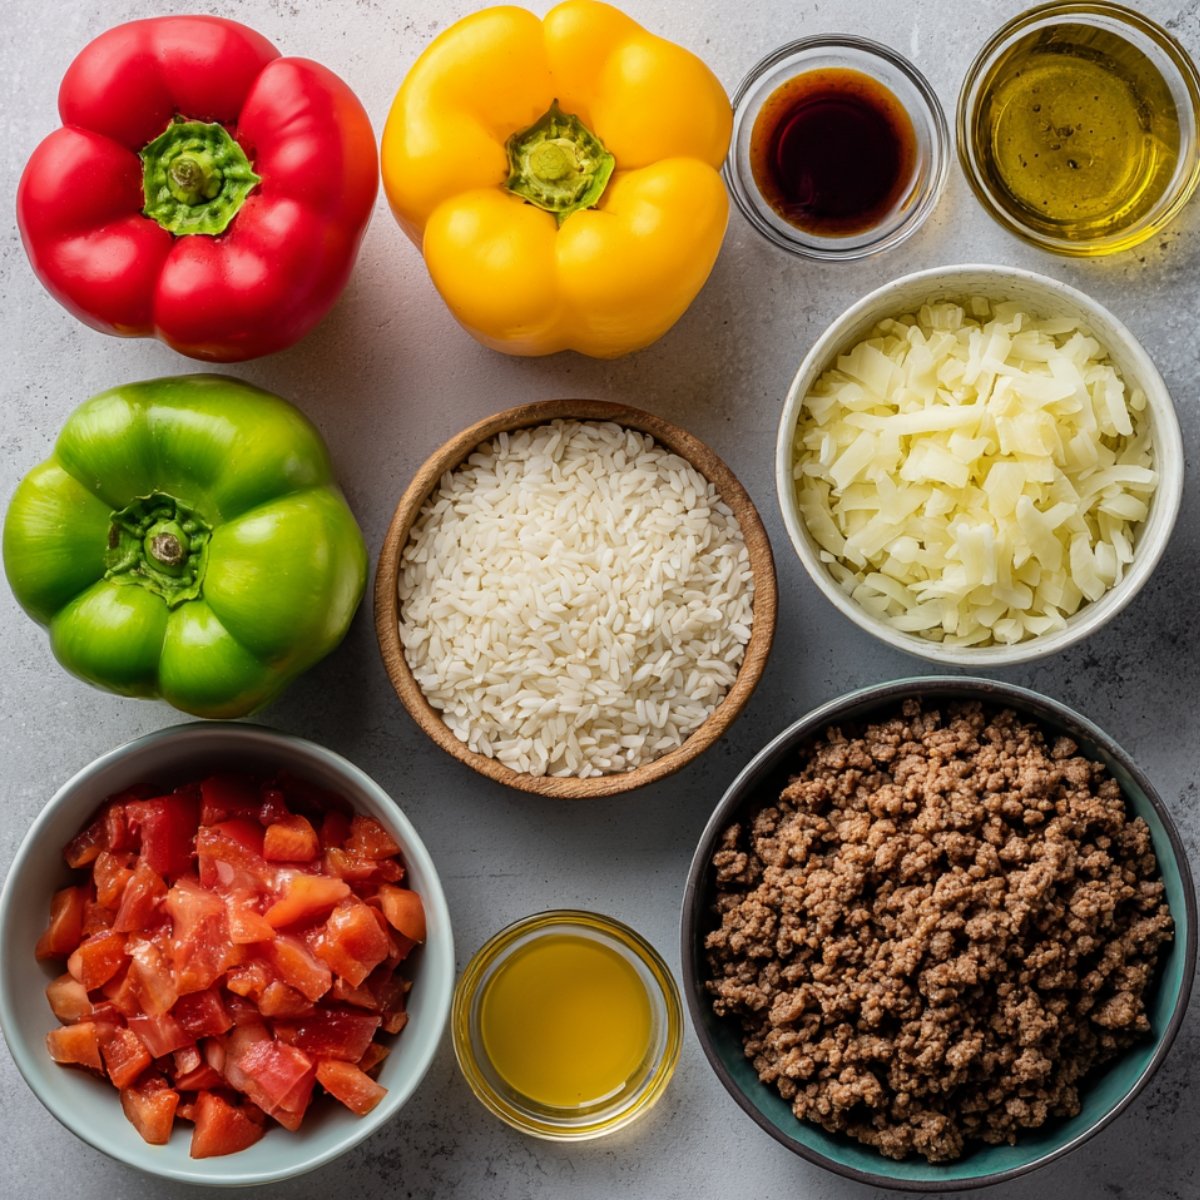
Ingredients for Stuffed Bell Peppers
For the Peppers:
- Large bell peppers (red, yellow, or green)
- Water for steaming
For the Filling:
- Ground beef (80/20 blend works best)
- Cooked white rice
- Yellow onion (diced)
- Garlic cloves
- Diced tomatoes
- Worcestershire sauce
- Salt and black pepper
- Dried oregano
- Paprika
For the Topping:
- Shredded cheddar or mozzarella cheese
- Fresh parsley for garnish
Basic Equipment:
- Aluminum foil
- Large baking dish
- Sharp knife
- Large skillet
- Cutting board

How To Make Stuffed Bell Peppers Step By Step
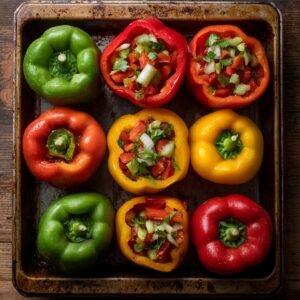
Preparation Phase:
- Preheat oven to 375°F
- Cut tops off peppers and remove seeds and membranes
- Dice pepper tops and save for filling
- Stand peppers in baking dish
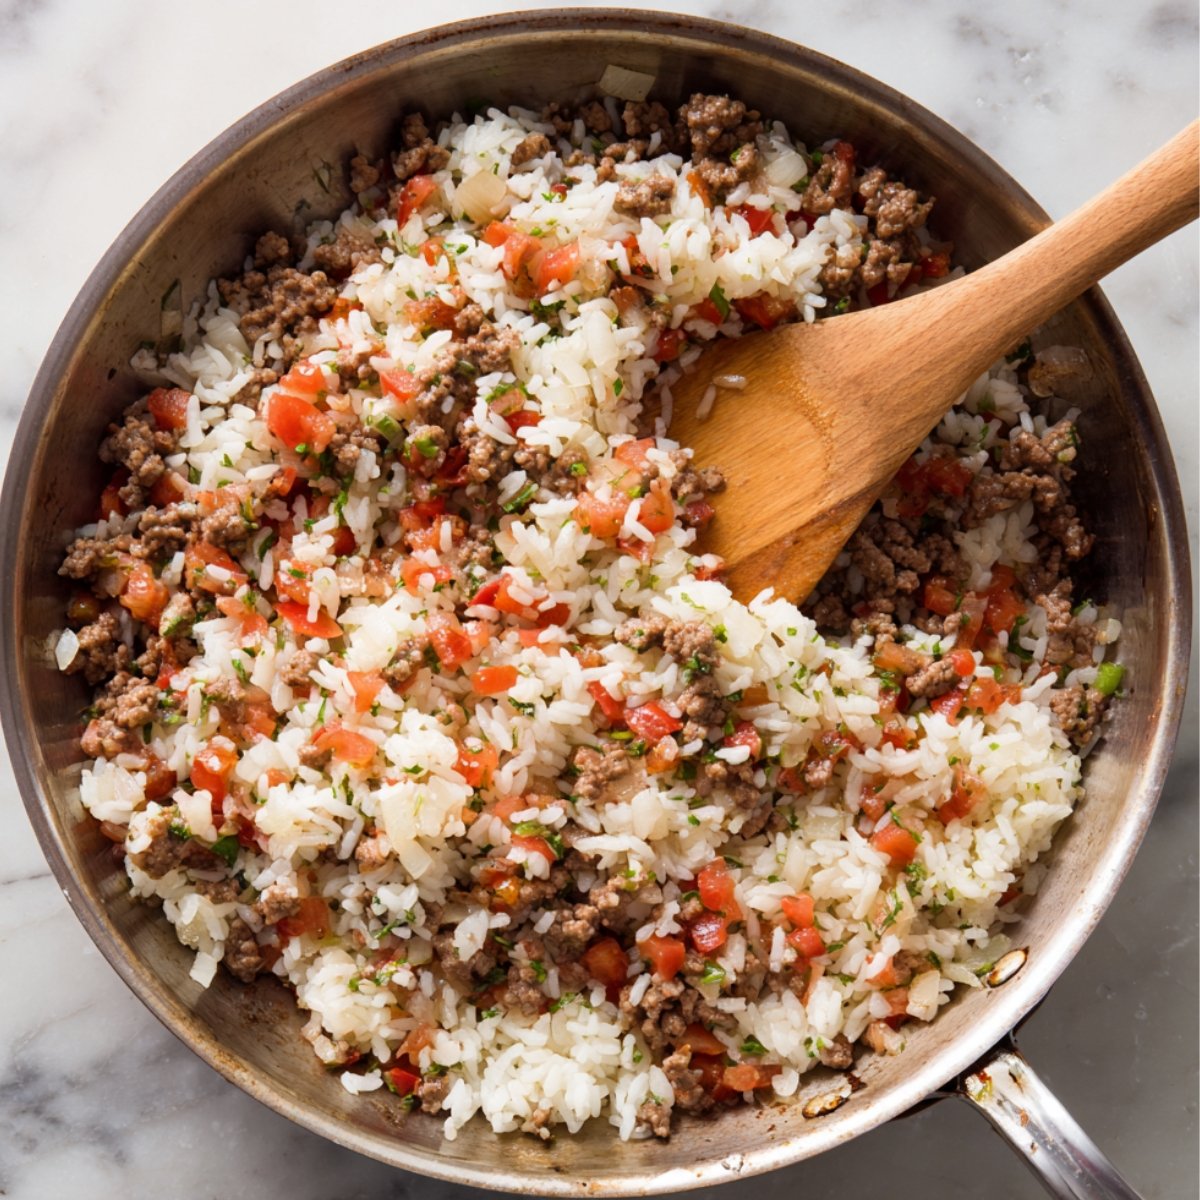
Make the Filling:
- Cook ground beef in large skillet over medium heat
- Add diced onion and cook until softened
- Add garlic, diced pepper tops, and seasonings
- Stir in cooked rice and diced tomatoes
- Season with salt, pepper, and Worcestershire sauce

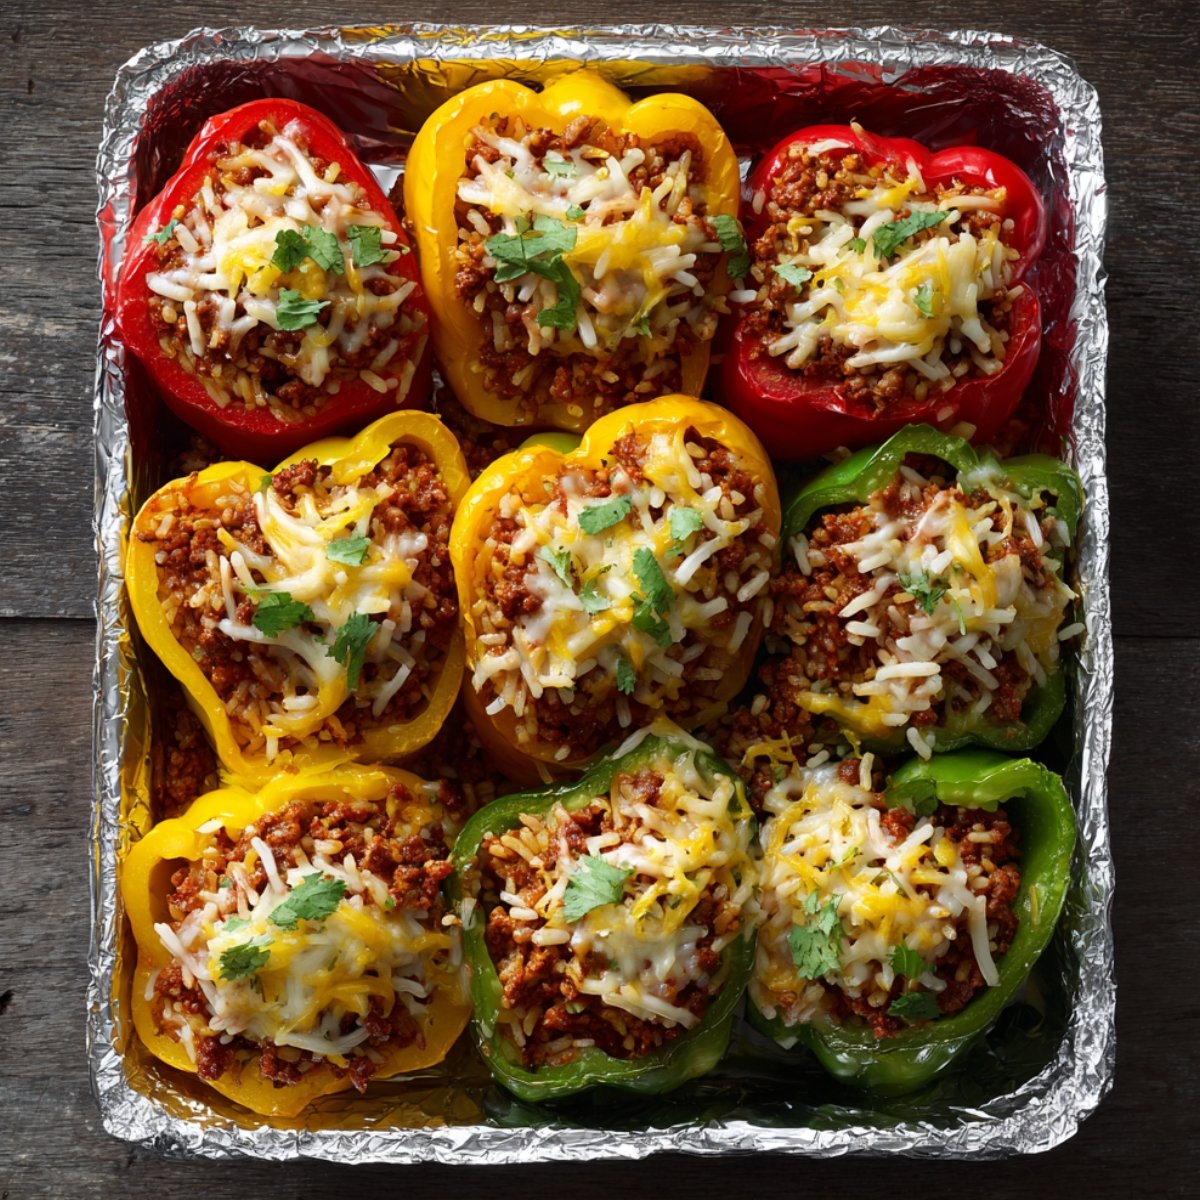
Stuff the Peppers:
- Fill each pepper with meat and rice mixture
- Pack filling gently but don't overstuff
- Add small amount of water to bottom of baking dish
- Cover tightly with aluminum foil

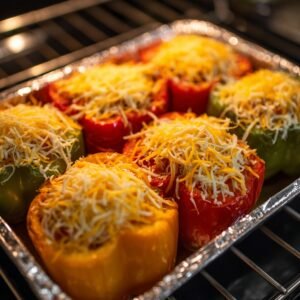
Bake to Perfection:
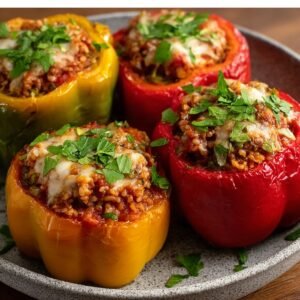
- Let rest 5 minutes before serving
- Bake covered for 35-40 minutes until peppers are tender
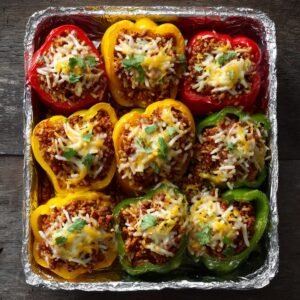
- Remove foil and top each pepper with shredded cheese
- Bake uncovered 10 more minutes until cheese melts
Smart Swaps for Your Stuffed Bell Peppers
Protein Options:
- Ground beef → Ground turkey for leaner option
- Beef → Ground chicken or pork
- Meat → Black beans and quinoa for vegetarian version
- Regular ground beef → Ground Italian sausage for more flavor
Grain Changes:
- White rice → Brown rice (cook longer)
- Rice → Quinoa or couscous
- Cooked grains → Cauliflower rice for low-carb
- Regular rice → Wild rice for nuttier flavor
Pepper Varieties:
- Bell peppers → Poblano peppers for mild heat
- Large peppers → Mini peppers for appetizers
- Regular → Different colored peppers for variety
Cheese Options:
- Cheddar → Mozzarella, Monterey Jack, or pepper jack
- Dairy cheese → Vegan cheese alternatives
- Shredded → Fresh cheese crumbles
Vegetable Additions:
- Standard → Mix in spinach for extra nutrition
- Basic filling → Add corn, zucchini, or mushrooms
- Plain → Include diced carrots or celery
Delicious Twists on Stuffed Bell Peppers
Mexican Style:
- Add cumin, chili powder, and paprika to filling
- Include corn and black beans
- Top with pepper jack cheese
- Serve with salsa and sour cream
Italian Version:
- Use Italian sausage instead of ground beef
- Add diced tomatoes and Italian seasoning
- Top with mozzarella and Parmesan
- Serve with marinara sauce on the side
Greek Inspired:
- Mix in diced olives and sun-dried tomatoes
- Season with oregano and lemon juice
- Top with crumbled feta cheese
- Add fresh herbs like dill or parsley
Healthy Twist:
- Use quinoa instead of rice
- Add extra vegetables like zucchini and carrots
- Use lean ground turkey
- Top with reduced-fat cheese
Southern Style:
- Top with sharp cheddar
- Add diced okra and tomatoes
- Season with cajun spices
- Include a touch of hot sauce
Equipment For Stuffed Bell Peppers
- Large baking dish (9x13 inch works well)
- Sharp knife for cutting peppers
- Large skillet for cooking filling
- Cutting board
- Aluminum foil
Storing Your Stuffed Bell Peppers
Fridge Storage (3-4 days):
- Cool completely before refrigerating
- Store in airtight container or wrap individually
- Reheat in oven at 350°F for 15-20 minutes
- Add splash of water to prevent drying out
Freezer Storage (2-3 months):
- Cool completely before freezing
- Wrap each pepper individually in plastic wrap
- Store in freezer-safe containers or bags
- Thaw overnight in fridge before reheating
Reheating Tips:
- Oven method works best - cover with foil
- Microwave works but peppers may get soggy
- Add fresh cheese on top when reheating
- Check that filling is heated through center
Make-Ahead Strategy:
- Perfect for meal prep or entertaining
- Assemble peppers without baking up to 24 hours ahead
- Cover tightly and refrigerate until ready to cook
- Add 10-15 minutes to baking time if cooking from cold
Why This Stuffed Bell Peppers Recipe Works
This stuffed bell peppers recipe works because it combines the right cooking method with simple, flavorful ingredients. The peppers bake in a covered dish with a little water, which creates steam that softens them perfectly while keeping the filling moist. At the same time, the savory mixture of beef, rice, tomatoes, and seasonings develops rich flavor without requiring hours of cooking. The rice absorbs juices from the meat and vegetables, ensuring the filling holds together instead of becoming watery.
The final touches make the dish shine. Adding cheese only in the last 10 minutes gives you that gooey, golden topping without burning it, while a short resting time after baking allows the filling to set and the flavors to meld. The result is a tender, hearty, and comforting meal that's easy enough for weeknights but impressive enough to serve guests. Plus, the method is flexible, so you can swap in turkey, sausage, or even vegetarian fillings and still get the same delicious results.
Top Tip
- The foundation of perfect stuffed bell peppers starts with proper pepper preparation, and this is where most people go wrong. When you cut the top off each pepper, don't just scoop out the obvious seeds - you need to remove every bit of that white membrane inside. Those tough, bitter white ribs don't soften during the 45-minute cooking time and create unpleasant chewy spots that ruin the eating experience. Use a small spoon to scrape out every white piece you can see. Also, don't skip adding water to the bottom of the baking dish - that quarter inch of water creates steam that gently cooks the peppers from the outside while keeping the filling moist.
- Timing your cheese addition separates amateur cooks from those who know what they're doing. If you put cheese on top from the beginning, it will be burnt and rubbery by the time the peppers are tender. Instead, bake covered for 35-40 minutes, then remove foil, add cheese, and return for just 10 more minutes. The resting period after baking isn't optional either - those peppers are molten hot inside, and the filling needs 5-10 minutes to set up properly. During this time, the rice finishes absorbing liquid and everything firms up to the right consistency while preventing anyone from burning their tongue.
The Stuffed Bell Peppers Recipe My Grandma Wouldn't Let Me Forget
My grandmother taught me that stuffed bell peppers were more than just a meal - they were a tradition. She would carefully slice the tops, scrape away the white ribs, and remind me that the secret to tender, flavorful peppers was adding a little water to the baking dish. Her filling was simple, with beef, rice, onions, and tomatoes, but she layered the flavors with patience, never rushing the process. Watching her cook felt like a lesson in both food and love, and the smell of peppers baking in the oven always meant family was gathering together.
Even today, I can still hear her voice as I make this recipe for my own family. She insisted that some dishes had to be learned by heart, not just read from a card, and she was right. Every time I pull a bubbling tray of peppers from the oven, I'm reminded of the lessons she passed down - that good food is about care, memory, and sharing at the table. It's a recipe I could never forget, because it connects me to her every time I make it.
FAQ
Do you pre-cook bell peppers before stuffing them?
You don't need to pre-cook bell peppers if you're baking them covered with water in the dish. The steam created during baking makes them perfectly tender. However, if your peppers are very thick-walled or you prefer softer peppers, blanch them in boiling water for 3-4 minutes before stuffing.
What can you stuff bell peppers with?
Traditional stuffing includes ground beef, rice, onions, and seasonings, but you can use ground turkey, chicken, or vegetarian options like quinoa and black beans. Popular additions include corn, mushrooms, cheese, and diced tomatoes. The key is keeping the moisture content balanced so the filling doesn't get soggy.
Do peppers need to be cooked before stuffing?
No, raw peppers work perfectly when baked covered with steam. The 45-minute covered baking time is enough to make them tender. Pre-cooking is only necessary if you want very soft peppers or are using particularly thick-walled varieties that might not cook through completely.
What temperature should I cook stuffed bell peppers at?
Bake stuffed bell peppers at 375°F covered for 35-40 minutes, then uncovered with cheese for 10 more minutes. This temperature cooks the peppers through without burning the tops. Higher temperatures cook unevenly, while lower temperatures take too long and can dry out the filling.
Comfort Food Made Simple!
Now you have all the secrets to making perfect stuffed bell peppers - from properly cleaning out those white membranes to timing the cheese just right. This classic comfort food recipe proves that some dishes never go out of style because they combine simple ingredients into something truly satisfying and delicious.
Craving more hearty comfort classics? Try our Classic Meatloaf Recipe that pairs beautifully with these peppers for a complete retro dinner. Want another Stuffed Bell Peppers favorite? Our Stuffed Zucchini Boats Recipe uses similar techniques with a lighter summer twist. Need a side dish? Our Garlic Mashed Potatoes Recipe rounds out this comfort food feast perfectly!
Share your stuffed pepper success! We love seeing your colorful pepper creations and family dinner tables!
Rate this recipe and join our cooking community!
Related
Looking for other recipes like this? Try these:


Pairing
These are my favorite dishes to serve with stuffed bell peppers


stuffed bell peppers
Ingredients
Equipment
Method
- Preheat oven to 375°F. Cut tops off peppers, remove seeds and membranes, dice tops for filling, and stand peppers in baking dish.

- Cook beef in skillet over medium heat. Add onion until softened, then stir in garlic, diced pepper tops, rice, tomatoes, and seasonings. Add Worcestershire sauce, salt, and pepper.
- Fill each pepper with mixture, packing gently. Add water to bottom of dish and cover tightly with foil.
- Bake covered for 35-40 minutes until peppers are tender.
- Remove foil, sprinkle cheese on top, and bake uncovered 10 minutes until melted and bubbly. Rest 5 minutes before serving.
Leave a Reply