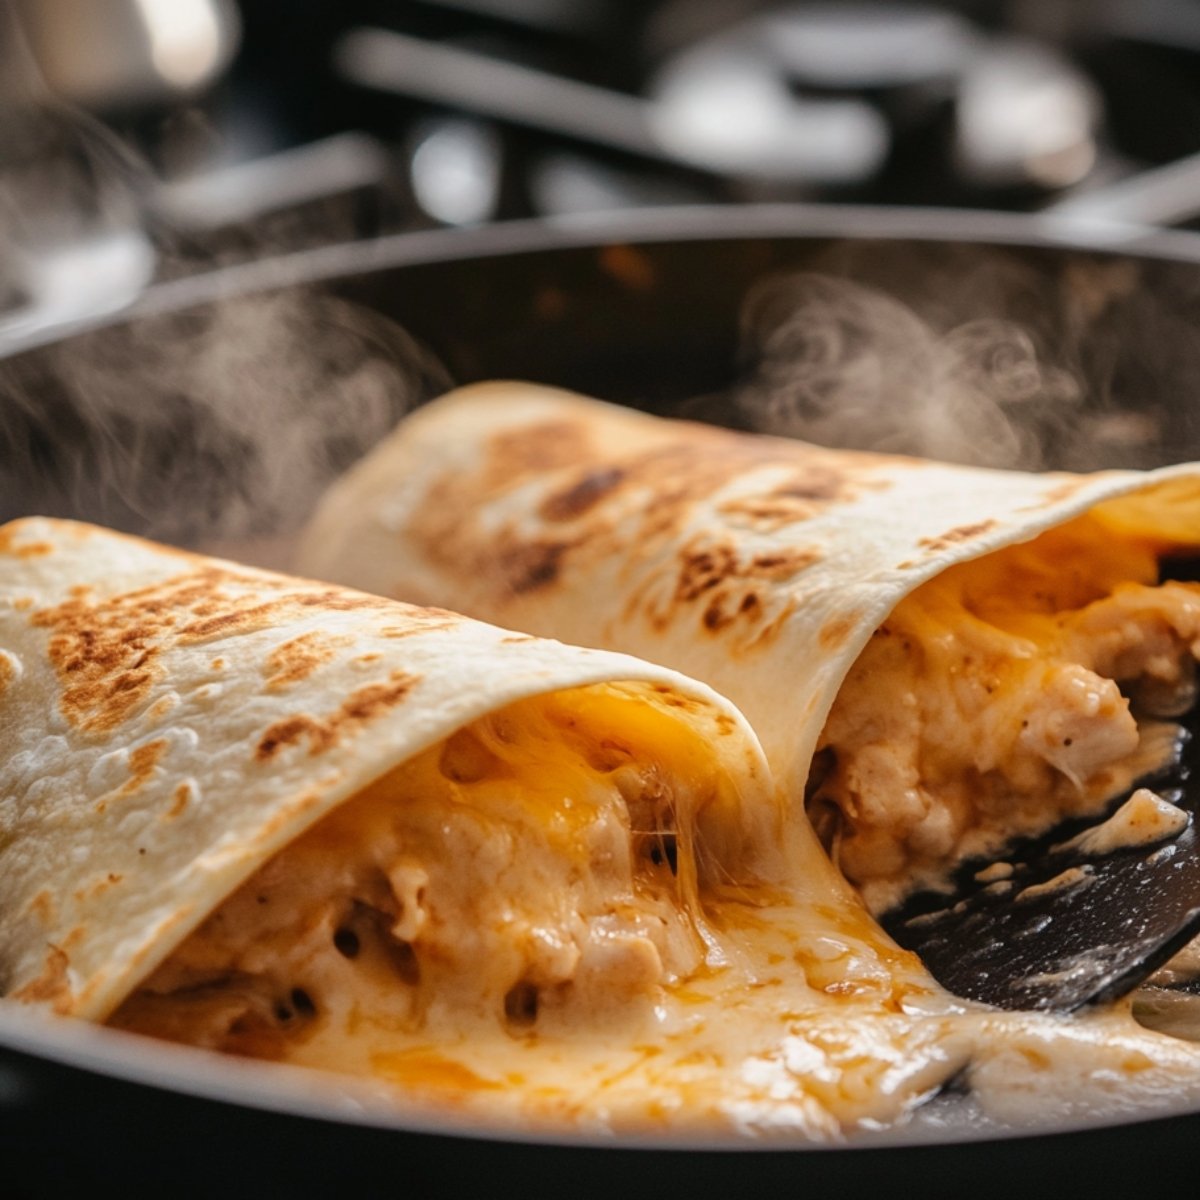
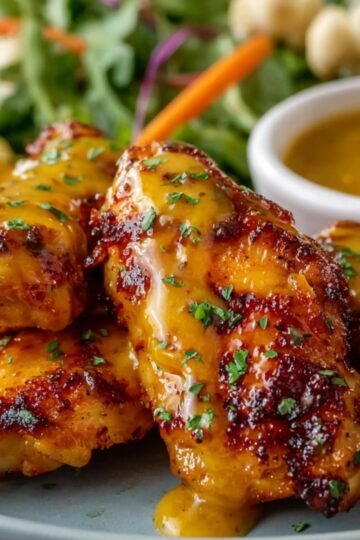
These cheesy garlic chicken wraps have become our go to dinner when everyone's starving and I need something fast. After years of trying different quick meals, this recipe won out because it takes just 15 minutes and uses stuff we usually have on hand. What started as a way to use up leftover rotisserie chicken turned into Max's favorite dinner request he asks for these at least twice a week. The combo of tender chicken, gooey cheese, and that garlicky goodness all wrapped up in a warm tortilla just works.

Why You'll Love These Cheesy Garlic Chicken Wraps
This recipe has become a lifesaver in our house for several reasons. It's super quick - about 15 minutes from start to finish which is perfect when everyone's hungry and I'm already running late. The prep work is really simple, especially if you grab a rotisserie chicken from the store instead of cooking your own.
What I love most is how flexible these wraps are. Max keeps his basic with just chicken and cheese, but I pile mine high with whatever vegetables we have around - spinach, tomatoes, bell peppers. The garlic butter mixture makes everything taste good together, even the stuff Max usually won't touch.
They don't cost much to make either. One rotisserie chicken feeds our family for two meals, and the rest of the ingredients are pantry basics. These also taste great as leftovers for lunch, though they rarely make it to the next day in our house. Best of all, even our pickiest eaters actually ask for seconds.
Jump to:
- Why You'll Love These Cheesy Garlic Chicken Wraps
- Ingredients for Cheesy Garlic Chicken Wraps
- How To Make Cheesy Garlic Chicken Wraps Step By Step
- Smart Swaps for Cheesy Garlic Chicken Wraps
- Creative Twists on Cheesy Garlic Chicken Wraps
- Equipement For Cheesy Garlic Chicken Wraps
- Storing Your Cheesy Garlic Chicken Wraps
- Why This Recipe Works
- Top Tip
- The Recipe My Grandma Wouldn't Let Me Forget
- FAQ
- Quick Dinner Success!
- Related
- Pairing
- Cheesy Garlic Chicken Wraps
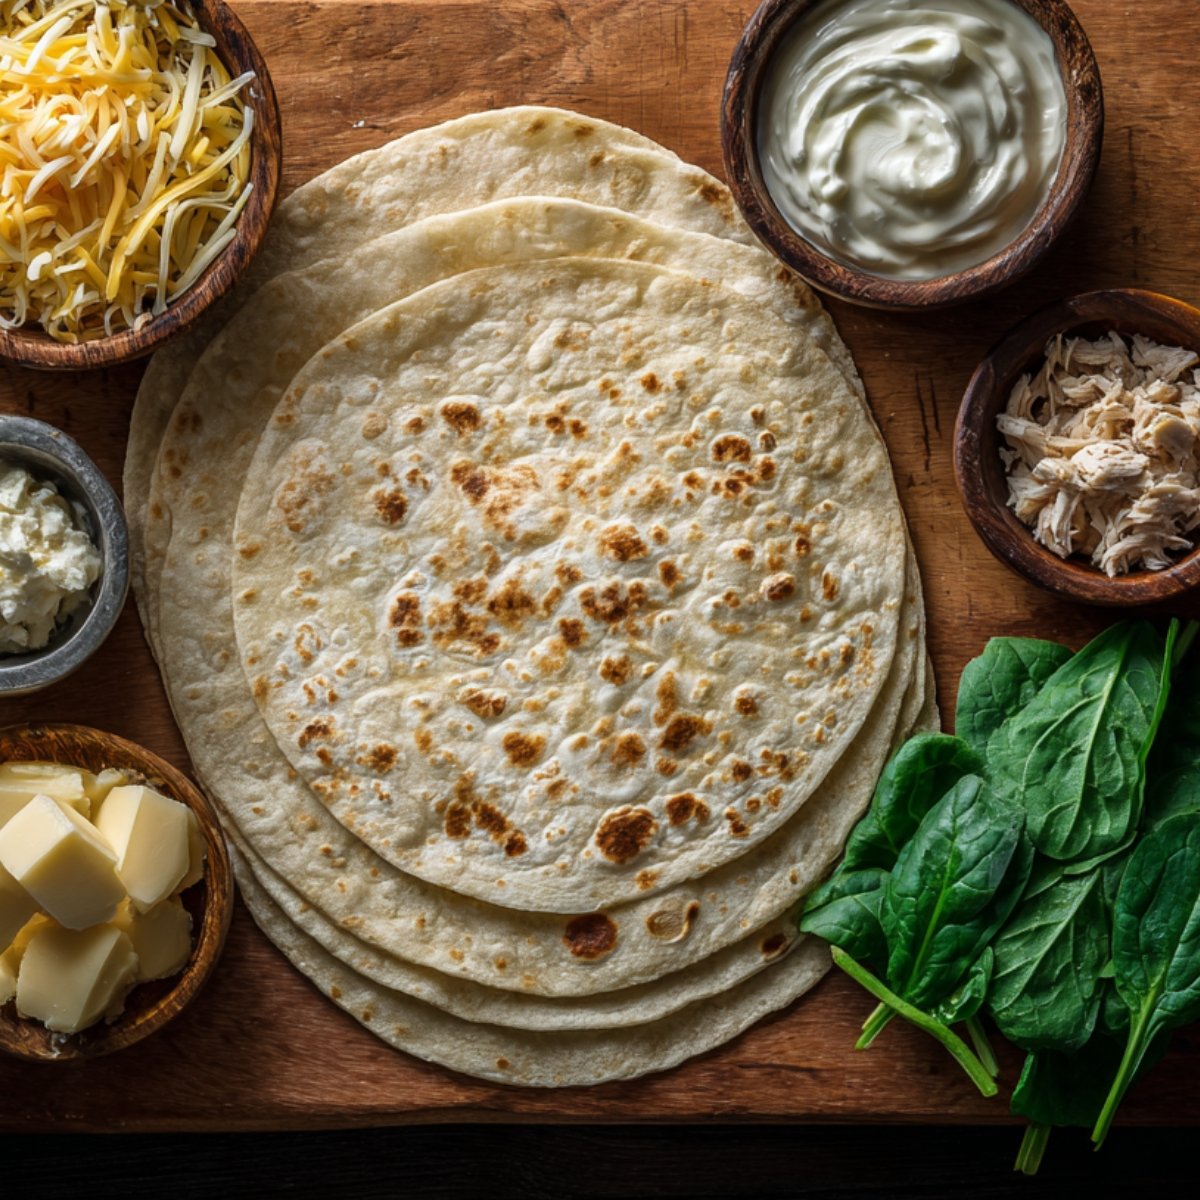
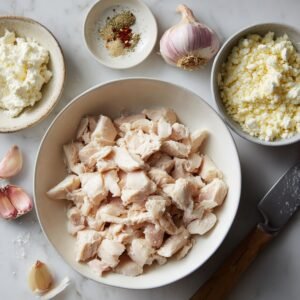
Ingredients for Cheesy Garlic Chicken Wraps
The Main Players:
- Large flour tortillas
- Cooked chicken
- Shredded cheese
- Cream cheese
- Fresh garlic cloves
- Butter
- Fresh spinach leaves
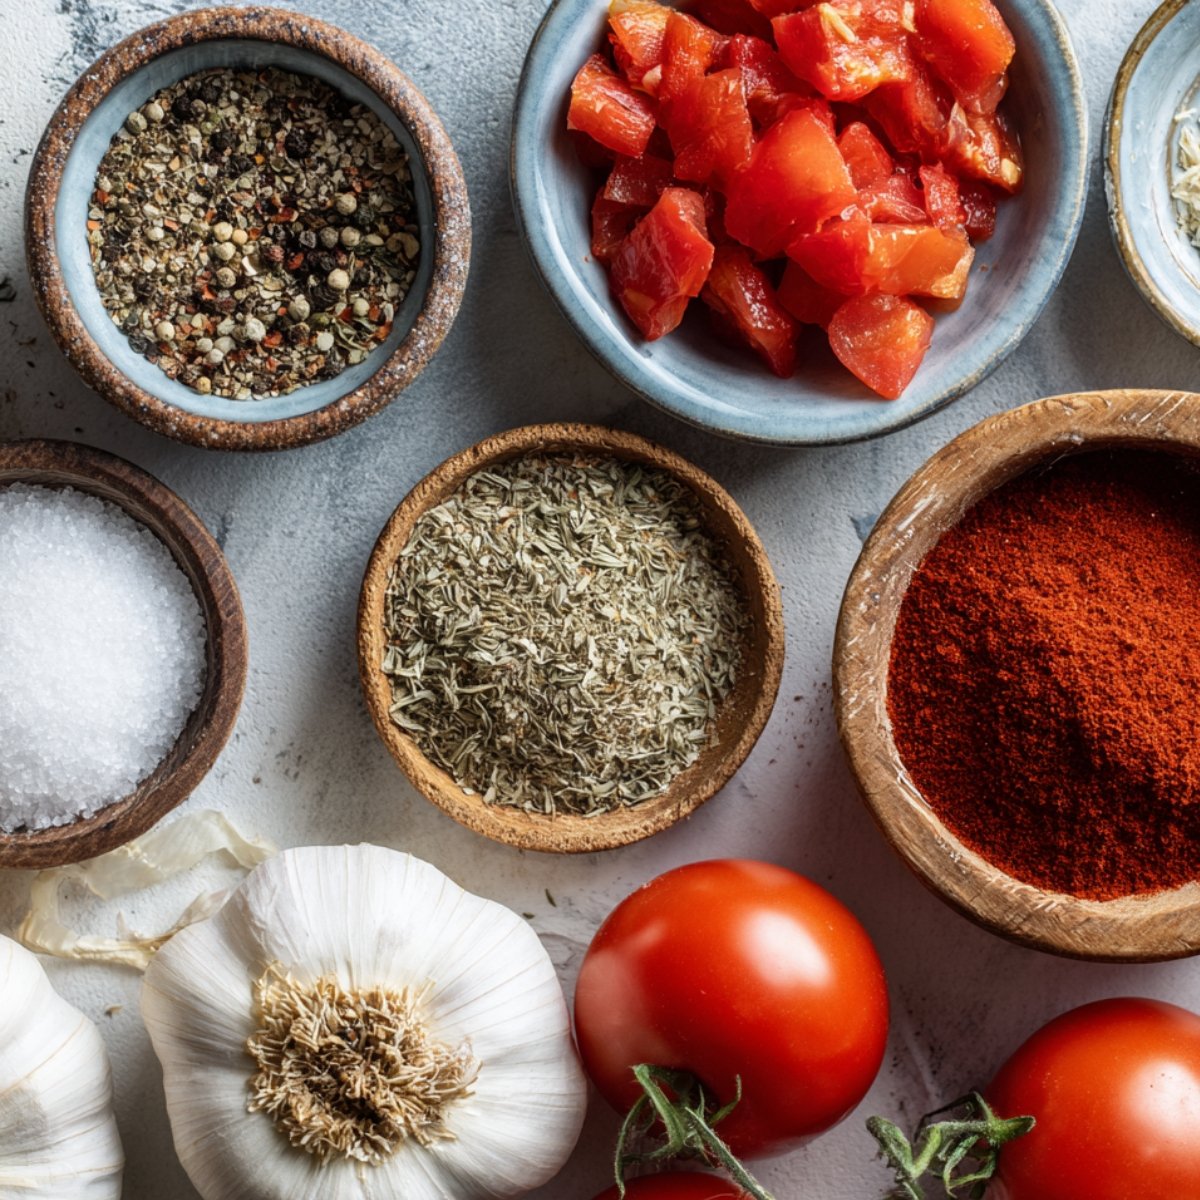
Flavor Boosters:
- Garlic powder
- Black pepper
- Salt
- Dried Italian seasoning
- Optional: diced tomatoes
For Assembly:
- Non-stick cooking spray
- Paper towels
See recipe card for quantities.
How To Make Cheesy Garlic Chicken Wraps Step By Step
Prep Work:
- Shred your chicken into bite-sized pieces
- Let cream cheese soften at room temperature
- Mince 2-3 garlic cloves finely
- Get all ingredients within reach

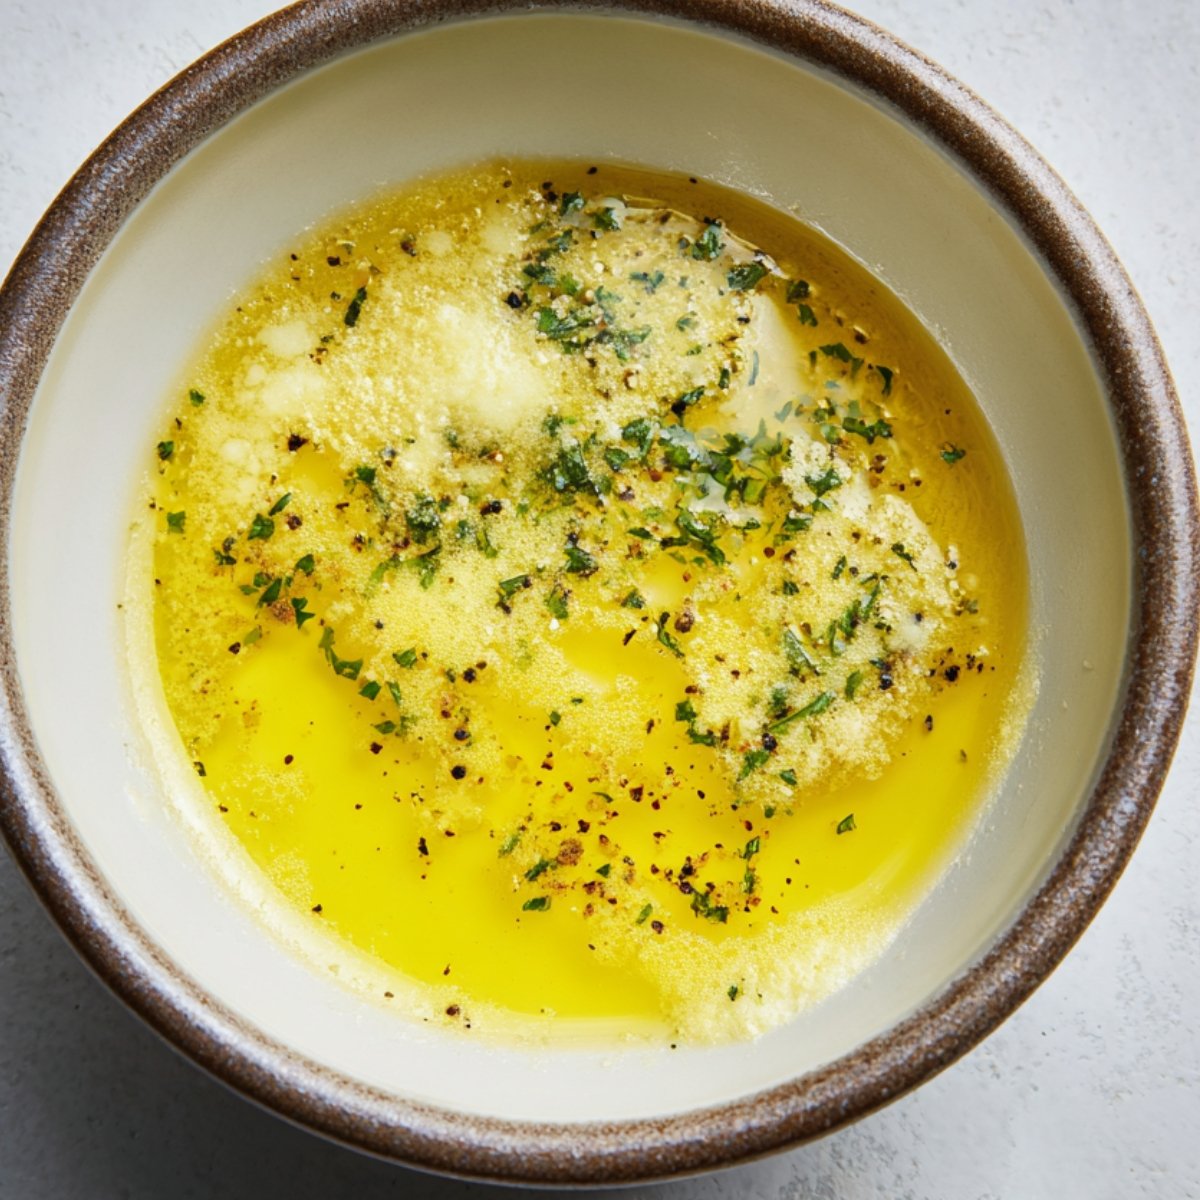
Make the Garlic Mixture:
- Melt butter in microwave (about 30 seconds)
- Stir in minced garlic and seasonings
- Mix until well combined
- Set aside for brushing
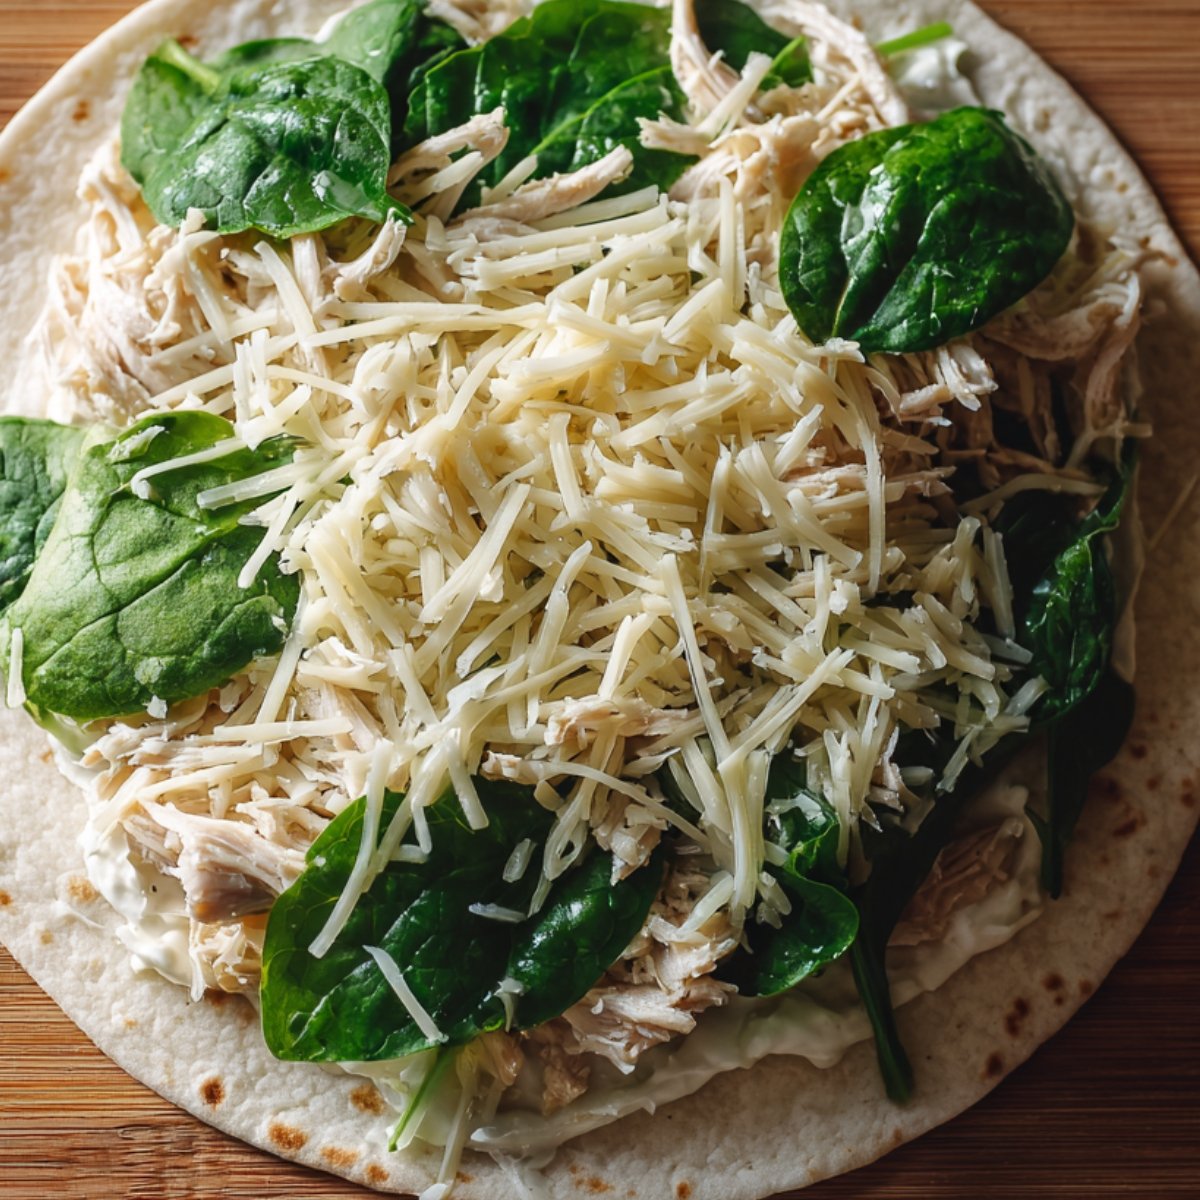
Assembly Time:
- Lay tortilla flat on clean surface
- Spread thin layer of softened cream cheese
- Add handful of spinach leaves
- Layer on shredded chicken
- Sprinkle cheese generously
- Brush edges with garlic butter
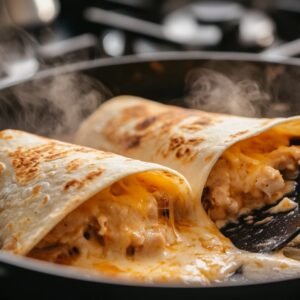
Rolling and Cooking:
- Fold in sides, then roll tightly from bottom
- Heat skillet over medium heat
- Spray with cooking spray
- Place wraps seam-side down
- Cook 2-3 minutes until golden
- Flip and cook another 2 minutes
Smart Swaps for Cheesy Garlic Chicken Wraps
Protein Options:
- Rotisserie chicken → Leftover grilled chicken
- Chicken → Turkey or ham
- Meat → Scrambled eggs for breakfast version
- Regular → Canned chicken
Cheese Changes:
- Cheddar → Monterey Jack or Swiss
- Shredded → Sliced cheese
- Regular → Low-fat versions
- Dairy → Vegan cheese alternatives
Wrap Alternatives:
- Flour tortillas → Whole wheat tortillas
- Large → Smaller tortillas
- Tortillas → Large lettuce leaves for low-carb
- Regular → Gluten-free wraps
Cream Cheese Swaps:
- Regular → Light cream cheese
- Cream cheese → Greek yogurt
- Dairy → Vegan cream cheese spread
Creative Twists on Cheesy Garlic Chicken Wraps
Pizza Style:
- Add pepperoni slices
- Use mozzarella cheese
- Include diced tomatoes
- Sprinkle Italian herbs
Mexican Fiesta:
- Mix in salsa with chicken
- Use Mexican cheese blend
- Add diced jalapeños
- Finish with cilantro
Buffalo Kick:
- Toss chicken in buffalo sauce
- Use ranch instead of garlic butter
- Add celery pieces
- Blue cheese crumbles
Breakfast Version:
- Scrambled eggs instead of chicken
- Add cooked bacon bits
- Use breakfast cheese
- Include hash browns
Veggie Loaded:
- Extra spinach and tomatoes
- Diced bell peppers
- Shredded carrots
- Cucumber slices
Equipement For Cheesy Garlic Chicken Wraps
- Large skillet or griddle
- Sharp knife for chopping
- Cutting board
- Small bowl for garlic butter
- Spatula for flipping
Storing Your Cheesy Garlic Chicken Wraps
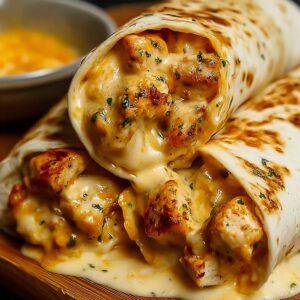
Right After Cooking:
- Let them cool for 2-3 minutes before cutting
- Cut in half diagonally for easier eating
- Serve immediately while cheese is still melty
Refrigerator Storage (2-3 days):
- Wrap individually in foil or plastic wrap
- Store in airtight container
- Keep uncooked and cooked ones separate
Reheating Tips:
- Microwave: 30-45 seconds (they get a bit soft)
- Skillet: 1-2 minutes per side (keeps them crispy)
- Oven: 10 minutes at 350°F wrapped in foil
Make-Ahead Tricks:
- Assemble wraps but don't cook them
- Wrap tightly and refrigerate up to 24 hours
- Cook fresh when ready to eat
Why This Recipe Works
This cheesy garlic chicken wraps recipe succeeds because it tackles the main problems with most wrap recipes. First, the cream cheese acts as both a flavor base and a "glue" that keeps everything from sliding around inside the tortilla. Most wraps fall apart because there's nothing to hold the filling together, but the cream cheese solves that completely.
The cheesy garlic chicken wraps butter mixture serves double duty too. It flavors the filling when you brush it inside, but more importantly, it creates that crispy, golden exterior when the tortilla hits the hot pan. This prevents the soggy wrap problem that happens when you just throw ingredients together without thinking about moisture control. The butter also helps the cheese melt evenly instead of creating those weird rubbery pockets you get with some recipes.
Top Tip
- Max actually came up with our favorite twist on these wraps completely by accident. Last summer, he was helping me make dinner when he grabbed what he thought was garlic powder from the spice cabinet. Turns out it was onion powder, and he dumped a whole bunch into the cheesy garlic chicken wraps butter before I noticed. I figured we'd already made the mixture, so we might as well try it.
- The combination of garlic and onion powder was incredible - way better than just garlic alone. Now we always use both, about half and half. It adds this deeper, richer flavor that makes people wonder what's different about our wraps. Max was so proud when everyone started asking for his "special recipe."
- We also discovered that letting the wrapped tortillas sit for about 5 minutes before cooking makes them easier to handle. The cream cheese softens up and everything settles together. Max calls this the "resting time," like the wraps are taking a little nap before they get cooked. Sometimes the best cooking tips come from eight-year-old logic.
The Recipe My Grandma Wouldn't Let Me Forget
My grandmother never cooked anything fancy, but she had this way of making simple food taste like magic. These wraps remind me so much of something she used to make when I was little - what she called "chicken roll-ups." She'd take leftover Sunday chicken, mix it with whatever cheese was in the fridge, and wrap it all up in a dish towel before pan-frying it until crispy.
The garlic butter part comes directly from her. She'd melt butter with fresh garlic for everything - toast, vegetables, even scrambled eggs. "Garlic makes everything better," she'd say while crushing cloves with the flat side of her knife. She taught me that trick when I was about Max's age, and I still do it the same way today.
FAQ
What is needed for a chicken wrap?
The basics are cooked chicken, a large tortilla, and something to bind it together like cream cheese or mayo. Add cheese, vegetables, and seasonings for flavor. The key is not overfilling so you can actually roll and eat it without everything falling out.
What to serve with cheesy chicken wraps?
These wraps are pretty filling on their own, but they pair well with simple sides like chips and salsa, fresh fruit, or a basic green salad. For kids, apple slices or carrot sticks work great. Keep sides light since the wraps are already rich and cheesy garlic chicken wraps.
How to make cheesy garlic bread with wraps?
Brush the outside of assembled wraps with garlic butter before cooking. The tortilla gets crispy and garlicky like cheesy garlic chicken wraps bread. You can also sprinkle parmesan on the outside for extra flavor. Cook them a bit longer to get them really golden and crispy.
What's the secret to a flavorful chicken wrap?
not just the chicken. Mix garlic powder into the cream cheese, season the vegetables, and don't forget salt and pepper. The cheesy garlic chicken wraps butter brushed on the tortilla makes a huge difference. Also, let flavors meld together for a few minutes before cooking.
Quick Dinner Success!
Now you have everything you need to make these cheesy garlic chicken wraps from the basic recipe to Max's onion powder discovery. These wraps prove that the best family meals don't have to be complicated or take hours to make.
Want more quick dinner ideas? Try our Healthy Shahi Tukda Recipe that's perfect for game nights and parties. Need something even faster? Our Delicious Gazpacho Recipe uses similar ingredients but takes even less time. For another crowd-pleaser, check out our Easy Caprese Salad Recipe that feeds a hungry family in minutes!
Share your wrap creations! We love seeing how families make these their own!
Rate this recipe and join our busy family cooking community!
Related
Looking for other recipes like this? Try these:
Pairing
These are my favorite dishes to serve with Cheesy Garlic Chicken Wraps


Cheesy Garlic Chicken Wraps
Ingredients
Equipment
Method
- Shred cooked chicken into small bite-sized pieces.
- Let cream cheese soften at room temperature.

- Finely mince fresh garlic cloves for full flavor.

- Gather and arrange all ingredients for easy prep.
- Melt the butter in microwave for about 30 seconds.
Leave a Reply